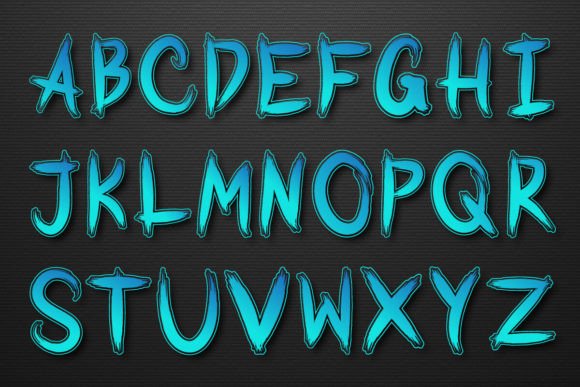
Mastering the Brush Alphabet A to Z
There is a distinct satisfaction in watching ink flow smoothly from a brush tip onto paper, transforming simple strokes into elegant curves. This art form, often referred to as modern calligraphy or brush lettering, relies heavily on mastering the Brush Alphabet a to Z. Unlike traditional penmanship, which prioritizes speed and uniformity, brush lettering celebrates variation, rhythm, and personal expression. For beginners, the journey begins not with complex compositions, but with understanding the fundamental structure of each letter.
The appeal of this style lies in its accessibility. You do not need years of classical training to start. With a basic brush pen and a bit of patience, anyone can learn to create stunning visuals. Whether you are a marketer looking to add a human touch to social media graphics, an educator creating engaging classroom materials, or a hobbyist seeking a mindful creative outlet, learning the Brush letter Alphabet A to Z opens up a world of design possibilities.
Understanding the Mechanics of Brush Lettering
To truly grasp the Handwriting alphabet A to Z in a brush context, one must understand the core principle: pressure control. Traditional handwriting uses consistent pressure, resulting in lines of uniform width. Brush lettering, however, is dynamic. It relies on two primary types of strokes:
- Downstrokes: When you pull the pen downward toward yourself, you apply gentle pressure. This causes the flexible tip to splay out, creating a thick, bold line.
- Upstrokes: When you push the pen upward away from yourself, you use barely any pressure. The tip remains narrow, producing a delicate, thin line.
This contrast between thick and thin lines is what gives brush lettering its characteristic elegance. When practicing the Brush Alphabet a to Z, it is crucial to remember that upstrokes should be light and airy, while downstrokes should be confident and grounded. Many beginners make the mistake of pressing too hard on upstrokes, which can damage the brush tip and result in messy, blob-like letters. Patience is key; let the tool do the work.
Why Learn the Brush Letter Alphabet?
Beyond the aesthetic appeal, there are practical reasons to invest time in learning the Brush letter Alphabet A to Z. In a digital age dominated by standardized fonts, hand-lettered text stands out. It conveys warmth, authenticity, and effort. For small business owners and entrepreneurs, using custom brush lettering on packaging, logos, or thank-you notes can significantly enhance brand identity. It signals attention to detail and a personal connection with the customer.
For content creators and bloggers, integrating hand-lettered elements into digital designs can break the monotony of stock photography and rigid typography. Even if you digitize your work later, starting with a hand-drawn Handwriting alphabet A to Z provides a unique organic feel that software filters often struggle to replicate authentically.
Moreover, the practice itself offers mental health benefits. The repetitive motion of forming letters requires focus and breath control, acting as a form of active meditation. Many practitioners find that spending twenty minutes practicing their Brush Alphabet a to Z helps reduce stress and clear the mind after a hectic day.
Practical Applications in Daily Life
Once you have a basic grasp of the individual letters, the applications are endless. Here are several realistic ways to incorporate your new skills:
- Greeting Cards and Invitations: Hand-lettered envelopes and card fronts add a special touch to weddings, birthdays, and holidays. Using the Brush Alphabet a to Z allows you to customize names and messages in a way that printed labels cannot.
- Home Decor: Create framed quotes or seasonal signs for your home. Simple words like "Welcome," "Grateful," or "Joy" look striking when rendered in bold brush script.
- Journaling and Planning: Enhance your bullet journals or planners with decorative headers. Using varied sizes from the Brush letter Alphabet A to Z helps organize sections visually while adding artistic flair.
- Gift Tags: Instead of generic tags, write recipient names directly on packages. It turns a simple gift into a personalized experience.
Educators can also benefit from these skills. Writing clear, attractive headings on whiteboards or creating visually appealing worksheets can increase student engagement. The Handwriting alphabet A to Z learned in brush style can be adapted to marker boards, making lessons more memorable.
Getting Started: Tools and Techniques
You do not need expensive equipment to begin. A dual-tip brush pen is ideal for beginners because it offers both a flexible brush end for lettering and a fine tip for details. Paper choice matters as well; smooth paper prevents the brush tip from fraying. Avoid textured papers initially, as they can catch the bristles and disrupt the flow of your Brush Alphabet a to Z practice.
Start by practicing basic strokes before attempting full letters. Draw rows of upstrokes and downstrokes until you feel comfortable controlling the pressure. Then, move on to simple lowercase letters like 'i', 'u', and 'n', which consist primarily of these basic movements. Gradually progress to more complex letters like 'g', 'y', and 's' that require loops and directional changes.
Consistency is more important than perfection. Aim to practice for short periods regularly rather than long sessions sporadically. Ten minutes a day focusing on the Brush letter Alphabet A to Z will yield better results than a three-hour session once a month. Muscle memory takes time to develop, so be kind to yourself during the learning process.
Common Challenges and How to Overcome Them
One common issue beginners face is shaky hands. This often stems from holding the pen too tightly or trying to move the fingers instead of the arm. Try to relax your grip and engage your shoulder and elbow when forming longer strokes. This creates smoother, more fluid lines in your Brush Alphabet a to Z.
Another challenge is spacing. Knowing how much space to leave between letters and words is crucial for readability. A good rule of thumb is to imagine an invisible oval around each letter; these ovals should touch but not overlap. Practicing with grid paper can help visualize these spatial relationships as you master the Handwriting alphabet A to Z.
Ink bleeding is also a concern, especially with lower-quality paper. If you notice ink spreading beyond the stroke lines, switch to a higher GSM (grams per square meter) paper specifically designed for marker or brush pen use. This ensures crisp edges and vibrant colors in your final pieces.
Embracing Your Unique Style
While learning the standard Brush Alphabet a to Z is essential, do not feel confined by rigid rules. As you gain confidence, you will naturally develop your own flair. Some may prefer tall, slender letters, while others might lean towards bold, rounded forms. Experiment with different angles, slants, and embellishments. The beauty of brush lettering is its versatility.
Remember, the goal is not to replicate someone else’s work perfectly but to express yourself clearly and beautifully. Whether you are designing a logo, writing a love letter, or simply relaxing with a pen and paper, the skills you build through practicing the Brush letter Alphabet A to Z will serve you well. Embrace the imperfections, enjoy the process, and let your creativity flow with every stroke.